
The Fox

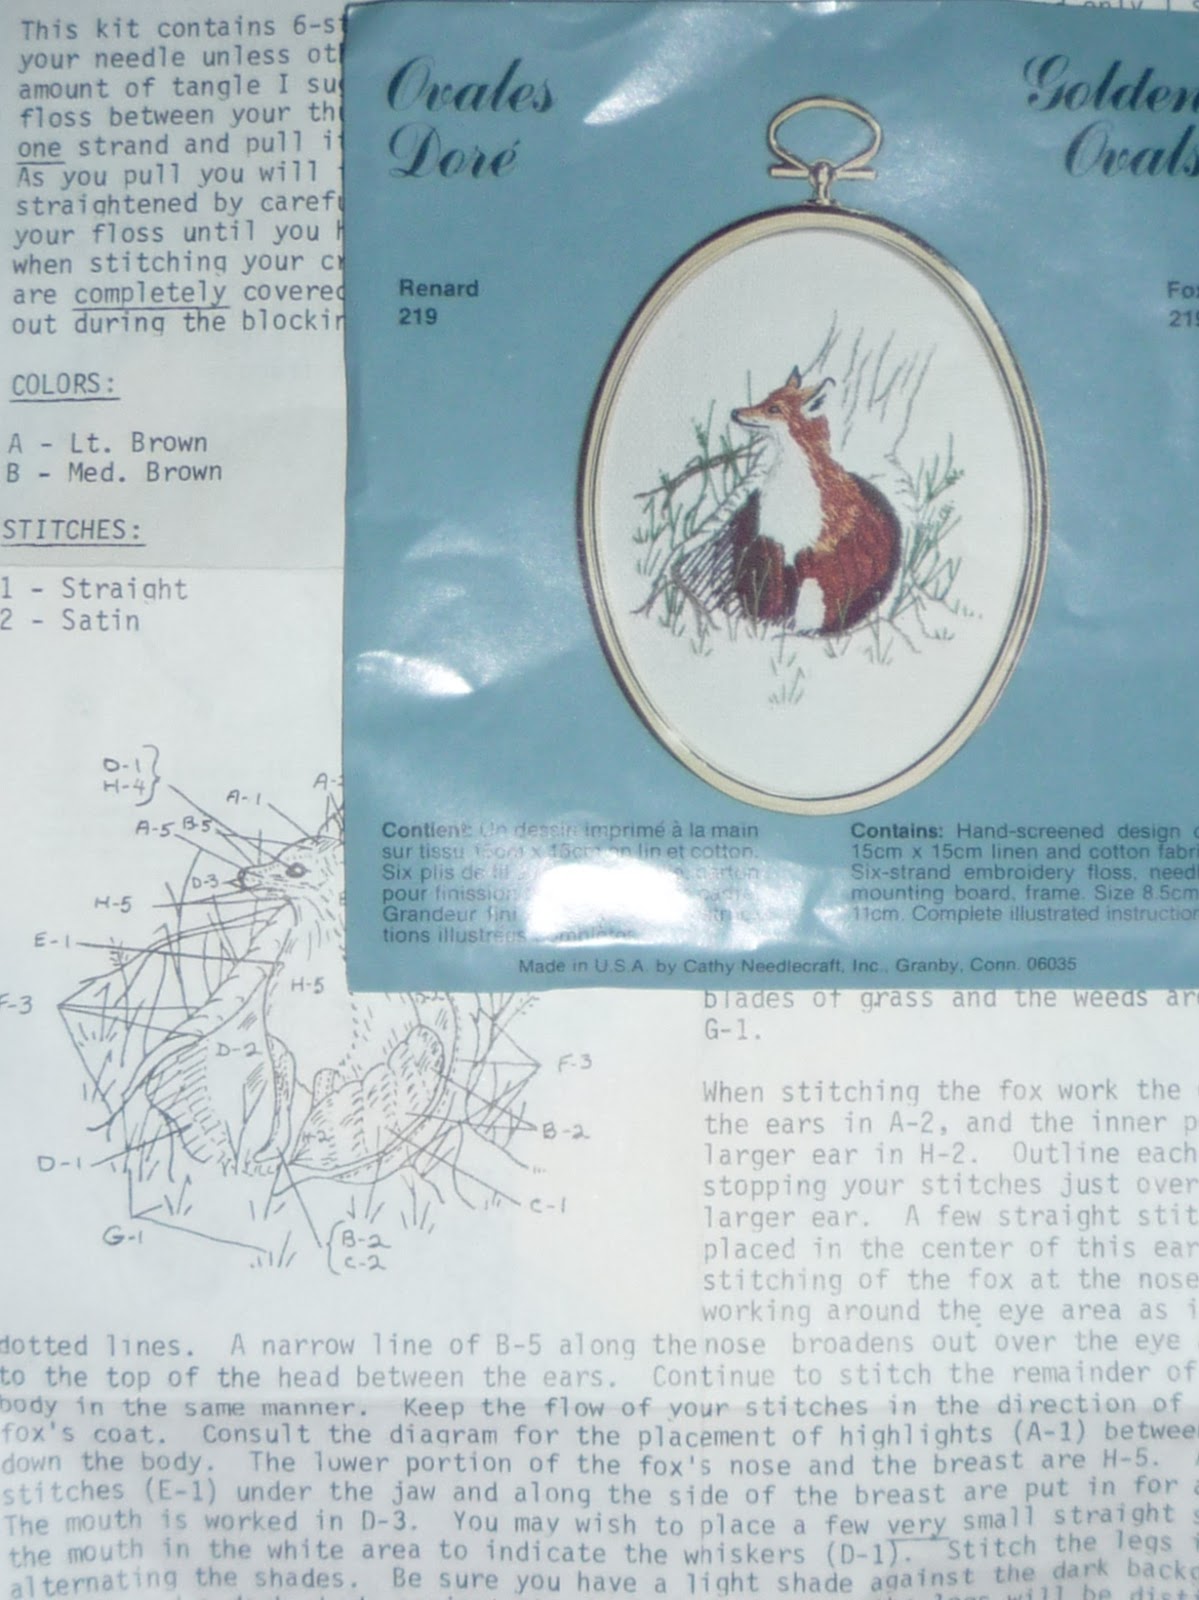
I picked up this little kit at the thrift store for under a dollar. Where to get ideas and where to get supplies are always recurring questions that come up in the crazy quilting groups so I thought I would share the story of this little fox.  He is a nice little kit, basically thread painting, but tiny and came with one of those nasty little plastic frames for him to go in.  I wouldn't have made it up as a kit and hung it anywhere but as a motif on Sarma's forest theme crazy quilt I thought it was perfect.  It came with the the threads, all good old DMC floss, instructions and the pattern printed on the fabric.  I discarded the bit of fabric after tracing the pattern onto tracing paper.  I basted the tracing paper right onto Sarma's block and stitched right through it.  I was very happy with the way he turned out on the block.
So, here is my advice to those just starting out and trying to build a stash for crazy quilting, especially when you live out in the boonies like I do and don't have access to a lot of stitching shops.  Frequent thrift stores, selvage centers, garage sales, etc. and keep your eyes and your mind open to what you find there!

Comments

That will be so cute in a crazy quilt!! Great job. :o)
Juli said…
That turned out lovely!
Mosaic Magpie said…
Thank you for sharing how you came about this little fellow. I have seen those small kits and never once gave a thought to using them like this.
Deb
I kept waiting for you to add....
"Say Hello, to my little friend"
Karrin Hurd said…
Your fox is fantastic Kerry!
Cathy said…
Oh how cute! You did a fantastic job of stitching him!! Hehe - a kit from a kit, LOL. hugs, Cat
Quayceetatter said…
Love the fox. I have been playing around with crossstitch critters and they do add to the block.
gocrazywithme said…
He is so cute! Well executed on different fabric, too. And now that you have the pattern, you can put him anywhere! And everywhere! Like on a block for me someday....

Popular posts from this blog

Giveaway Day! (CLOSED)

I am very happy to be joining in the Giveaway Day through Sew, Momma, Sew .  I have chosen to share one of my finds from a shopping trip, or treasure hunts as I think of them.  This is an antique sewing box -  I could not resist it when I saw it for sale!  Were you able to guess the item from the sneak peek earlier in the week? The box itself is fairly small, 8 inchs X 6 inchs and 4 inches high (20 cm X 15 cm and 10 cm high).  From my research it is of Asian origin. Inside the sewing box is lined with hand-painted silk.  The inside of the lid features a neat little needlebook. In the bottom of the sewing box there are more beautiful hand-painted blossoms and an attached pincushion.  I hope you are as charmed by this little box as I was when I found it and that you will enter my giveaway.  I will be pleased to mail internationally so everyone is invited to enter. To enter, visit my Etsy shop and then come back and leave me a comment telling me which item you like best.  Feel fr

Save the Stitches Finished!

 I finally finished my "Covid Project"!  I worked on Elizabeth Almond's beautiful blackwork sampler design, "Save the Stitches" for much longer than I would like to admit...  I have to say though that it was very satisfying every step of the way.  I have not been able to concentrate on stitching in any significant way for some time now due to chronic pain and the dullness that the pain meds cause but having finished this piece gives me hope for my stitching future.  I also love the framing which was lovingly done by MJ of "Art Effects" in High River, Alberta.

BAS - Week 79 - Feather Stitch Variations

I have about the next twenty BAS stitches scheduled and by happy coincidence this week's BAS is a series of Feather Stitch variations which coincide with this week's TAST stitch if you are following.  So, we can hit two birds with one stone!  These hardly look like feather stitch but they are.  They are created by making the "v"'s of the feather stitch vertical on the inside.  Very simple to do but a different look to an old stitch.  The second variation is created by doing two feather stitches at a time on each side, again making sure the inside of your "v"s are vertical and line up as much as possible. Same thing again in this one except they are in series of three.  To me these have the look of stitching on old crazy quilts so they are nice to add to your stable of stitch variations.  Hope you  enjoy them and have fun!